


I am the biggest kid at heart and love cartoons and anything that remind me of my childhood. I became very aware that there were a lot of very cool, retro single duvet covers in my local charity/thrift shops. Alas they were too small! I am by society’s standard an adult now, so sleep in a big grown up’s bed! So how could I get around the problem of loving the too small duvet covers and having a too big bed? Simple! I refashioned and up cycled. Here follows my tutorial.

You will need:
- A cool, beloved or retro single duvet cover.
- Single Pillowcase to match. (optional)
- A double duvet cover/ or enough material to compensate for the lack of one.
- Matching thread
- Tape measure
- Tailors chalk
- Pins
- Calculator (if you suck at maths like I do!)
Key

OK so now you’ve seen the materials you will need, you may be panicking, thinking ‘I don’t have the matching pillowcase!’ or that you don’t have a double duvet cover that will match, or that you even want to cut up! Well fear not, I have lots of ways to get round this. I am going to give you a basic tutorial using the single duvet cover, the double duvet cover and the single pillowcase as a guide and then tell you how to get around the small niggles.
Full tutorial after the jump!
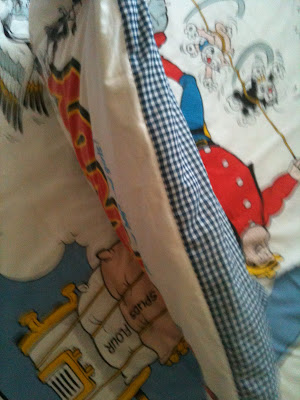
OK so the first step is to de-construct the pillowcase and single duvet covers at the seams. DO NOT deconstruct the double duvet!! You need to cut all stitched seams apart.

Full tutorial after the jump!
OK so the first step is to de-construct the pillowcase and single duvet covers at the seams. DO NOT deconstruct the double duvet!! You need to cut all stitched seams apart.

- Most pillowcases will be sewn with one side as a fold, so cut along the fold line and then you will have two panels to make up the front faces of your new PCs. (hopefully both side will have a pattern on, like mine did!) Now put these to one side.

Once you have deconstructed all sewn seams for the SDC you will be left with two large panels. (One being the front of the single duvet cover and the other being the back of it.) The back of my SDC was just plain white and a little stained so I discarded it. However if yours is patterned or a nice colour keep it, we can integrate it into the design later.- So by now you will have just the one panel in front of you. When I deconstructed the seams the seam allowances were still intact so I used these in the project. If you do not have any seam allowances to work with on your SDC panel you need to press one around all four edges. Make them approximately 1-1.5cms (or whatever the panel will allow.)
- Measure your SDC panel’s width and length and write down these measurements we will need these in a moment.
- Now you need to lay out your DDC on a flat service and measure it length and width. Take a note of these measurements.
- Now this is where you calculator comes in. My SDC measured width 135 cm and length 200 cm. The DDC measured width 200 cm x length 220 cm. Take the SDC’s width away from the DDC’s width and then divide by two. (200 cm – 135 cm= 65 cm, 65 cm ÷ 2= 32.5 cm) Now do the same for the SDC’s length and DDC’S length. (220cm – 200cm= 20cm, 20 cm ÷ 2 =10 cm) Now we know that the SDC panel must be laid with 32.5 cm width of DDC and 10 cm of DDC length around the edges.

- Lay the SDC panel onto the DDC and see if your measurements are correct and you are happy with the position. If you are then you need to mark the rectangle where the SDC panel will sit on the DDC. (I did this with tailors chalk)
- Then add a seam allowance inside your rectangle so the SDC panel will need to have something to be sewn to. You then need to cut the rectangle out of your DDC. (I did this because my retro duvet’s background was mainly white and therefore the DDC’s pattern would have showed through and looked a bit naff. I also did this so I had some material to make up the backs of the new pillowcases.) [However you DO NOT HAVE TO do this, you can simply sew the SDC panel onto the front of the DDC if you would prefer!]

- Pin SDC to the DDC and check your measurements one more time! If when it’s pinned on it looks even and you are happy, then it is time to get in front of the sewing machine.
- Sew the 4 lengths of the SDC. Smarten up any lose threads and your reconstructed duvet should be finished! (yay!)

- Now to make the pillowcases. You already have one half of each pillowcase due to the ones you’ve de constructed earlier. We simply need to make a back panel the same size. Remember that square I cut out of my DDC earlier? Well now is the time to put it to good use! But don’t worry if you didn’t cut your rectangle out, what about the back panel from the SDC? Or any other fabric of your choice. Now is the time to get creative!
Ok so my pillowcase panels had seam allowances intact as I carefully unpicked the seams. I simply used these as a guide. On the new panel I cut from the DDC I made a hem on one short end of the pillowcase. (This will be the opening. I then put the two panels right sides together and sewed the 3 seams that were needed to make the PC. Repeat a second time, or more if you have spare fabric to create enough pillows to go with your new re-constructed duvet!
Enjoy and get some zzz in your new Big Kid duvet cover!
O.k. so here are some modifications.


You don’t want to cut up a DDC.- That’s cool but you need to have enough material to make a finished product of 200cm x 200cm or 225cm x 220cm for a King size. Always measure the duvet you want to cover! Don’t just use these measurements; sizes are subject to change due to different manufacturers.
It is also important to note that by cutting a hole in the DDC and sewing the SDC onto it allows minimum fuss. The DDC I used had button fastenings. By just sewing my design onto it I didn’t have to worry about creating my own way of closing the duvet cover. It’s so much simpler in my opinion. If you REALLY do not have a DDC you can bear to cut, then I suggest scouring car boot sales, charity shops, thrift stores or your Gran’s linen closet (ask first!) for some inspiration.
You have a wicked single duvet cover that has the same pattern or smaller pattern on the underside.- You are lucky my friend! You could use this panel to try and make a border round your cool main print of the duvet…. Something like this…

Front of single duvet cover

Back of single duvet cover

I sadly didn’t have that lovely underside print to work with, but this is probably how I’d use it. As you can see I’d design some sort of patchwork front cover. You’d probably have to use some extra material to add to the design. Failing that save your back pattern piece for making the pillowcases.
· Or make the spare material into:
· Matching cushions,
· Bolster cushions!
· Make a cute skirt with this tutorial.
· Tote bag.
· Pet jacket.
· Or make it a bed for your pet so you can both match!


5 comments:
Thanks a lot for the wonderful tutorial. This is really adorable and how you sew them. My bedroom have a super king size duvet cover and can I use that in the same as you did.
Hey I was on you blog wall you write awesome. Superb liked it. I have seen some of your blog, I must tell you that you are absolutely outstanding.
I'm also a blogger I write on Home Decor, bedding and bedding tips. My recent blogs are Flat sheet vs fitted sheetWhat is a top sheet . You can read more on my blog wallLinen Change . Even you can purchase linen bedding accessories like Wrap Around Bed Skirt , 18 Bed Skirt , Flat Sheet Only from me. Thanks for your post.
Nice Explanation...
Website:- What is a duvet
Thank you for sharing such great information.
It has help me in finding out more detail about single duvet cover
Post a Comment